5. BSP
The Board Support Package is composed by a set files, patches, recipes, configuration files, etc. This chapter gives you the information you need when you want to customize something, fix a bug, or simply learn how the all thing has been assembled.
5.1. U-boot
The bootloader used by Tibidabo is u-boot. If you want to browse/modify the sources first you have to get them. There are two viable ways to do that:
- if you already built Tibidabo’s bootloader with Bitbake, then you already have them on your (virtual) disk, otherwise
- you can download and patch them.
Bitbake will place u-boot sources under:
/path/to/build/tmp/work/tibidabo-poky-linux-gnueabi/u-boot-fslc/v2013.10-r1/gitthis means that within the virtual machine you will find them under:
/home/architech/architech_sdk/architech/tibidabo/yocto/build/tmp/work/tibidabo-poky-linux-gnueabi/u-boot-fslc/v2013.10-r1/gitWe suggest you to don’t work under Bitbake build directory, you will pay a speed penalty and you can have troubles syncronizing the all thing. Just copy them some place else and do what you have to do.
If you didn’t build them already with Bitbake, or you just want to make every step by hand, you can always get them from the Internet by cloning the proper repository and checking out the proper commit:
cd ~/Documents
git clone git://github.com/Freescale/u-boot-imx.git
cd u-boot-imx
git checkout 079e214888279518ce061c71238a74a0c3db2c28
and by properly patching the sources:
cd ~/Documents
git clone -b dora https://github.com/architech-boards/meta-tibidabo.git
patch -p1 -d u-boot-imx/ < meta-tibidabo/recipes-bsp/u-boot/u-boot-fslc-v2013.10/0001-tibidabo.patch
Now that you have the sources, you can start browsing the code from the following files:
~/Documents/u-boot-imx/board/architech/tibidabo/*
~/Documents/u-boot-imx/include/configs/tibidabo.h
Suppose you modified something and you want to recompile the sources to test your patches, well, you need a cross-toolchain (see Cross compiler Section). If you are not working with the virtual machine, the most comfortable way to get the toolchain is to ask Bitbake for it:
bitbake meta-toolchainWhen Bitbake finishes, you will find an install script under directory:
/path/to/build/tmp/deploy/sdk/Install the script, and you will get under the installation directory a script to source to get your environment almost in place for compiling. The name of the script is:
environment-setup-cortexa9hf-vfp-neon-poky-linux-gnueabiAnyway, the environment is not quite right for compiling the bootloader and the Linux kernel, you need to unset a few variables:
unset CFLAGS CPPFLAGS CXXFLAGS LDFLAGSOk, now you a working environment to compile u-boot, just do:
cd ~/Documents/u-boot-imx
make mrproper
make tibidabo_config
make -j <2 * number of processor's cores> all
If you omit -j parameter, make will run one task after the other, if you specify it make will parallelize the tasks execution while respecting the dependencies between them. Generally, you will place a value for -j parameter corresponding to the double of your processor’s cores number, for example, on a quad core machine you will place -j 8.
Under the virtual machine, the toolchain is already installed under:
/home/architech/architech_sdk/architech/tibidabo/toolchainIn the very same directory there is a file, environment-nofs, that you can source that takes care of the environment for you when you want to compile the bootloader or the kernel
source /home/architech/architech_sdk/architech/tibidabo/toolchain/environment-nofsOnce the build process is complete, you will find u-boot.imx file in your sources directory, that’s the file you need to boot the board.
5.2. Linux Kernel
Like we saw for the bootloader, the first thing you need is: sources. Get them from Bitbake build directory (if you built the kernel with it) or get them from the Internet.
Bitbake will place the sources under directory:
/path/to/build/tmp/work/tibidabo-poky-linux-gnueabi/linux-imx/3.0.35-r38.14/gitIf you are working with the virtual machine, you will find them under directory:
/home/architech/architech_sdk/architech/tibidabo/yocto/build/tmp/work/tibidabo-poky-linux-gnueabi/linux-imx/3.0.35-r38.14/gitWe suggest you to don’t work under Bitbake build directory, you will pay a speed penalty and you could have troubles syncronizing the all thing. Just copy them some place else and do what you have to do.
If you didn’t build them already with Bitbake or you just want to do make every step by hand, you can always get them from the Internet by cloning the proper repository and checking out the proper hash commit:
cd ~/Documents
git clone git://git.freescale.com/imx/linux-2.6-imx.git
cd linux-2.6-imx
git checkout bdde708ebfde4a8c1d3829578d3f6481a343533a
and by properly patching the sources:
git clone -b dora https://github.com/architech-boards/meta-tibidabo.git
git clone -b dora git://git.yoctoproject.org/meta-fsl-arm
cd meta-fsl-arm
git checkout fb1681666fac9c096314cd01242be4613b7ff140
cd ~/Documents/linux-2.6-imx
patch -p1 < ../meta-fsl-arm/recipes-kernel/linux/linux-imx-3.0.35/drm-vivante-Add-00-sufix-in-returned-bus-Id.patc
patch -p1 < ../meta-fsl-arm/recipes-kernel/linux/linux-imx-3.0.35/epdc-Rename-mxcfb_epdc_kernel.h-to-mxc_epdc.h.patch
patch -p1 < ../meta-fsl-arm/recipes-kernel/linux/linux-imx-3.0.35/0001-perf-tools-Fix-getrusage-related-build-failure-on-gl.patch
patch -p1 < ../meta-fsl-arm/recipes-kernel/linux/linux-imx-3.0.35/0002-ARM-7668-1-fix-memset-related-crashes-caused-by-rece.patch
patch -p1 < ../meta-fsl-arm/recipes-kernel/linux/linux-imx-3.0.35/0003-ARM-7670-1-fix-the-memset-fix.patch
patch -p1 < ../meta-fsl-arm/recipes-kernel/linux/linux-imx-3.0.35/0004-ENGR00271136-Fix-build-break-when-CONFIG_CLK_DEBUG-i.patch
patch -p1 < ../meta-fsl-arm/recipes-kernel/linux/linux-imx-3.0.35/0005-ENGR00271359-Add-Multi-touch-support.patch
patch -p1 < ../meta-fsl-arm/recipes-kernel/linux/linux-imx-3.0.35/0006-Add-support-for-DVI-monitors.patch
patch -p1 < ../meta-fsl-arm/recipes-kernel/linux/linux-imx-3.0.35/0007-ARM-mach-mx6-board-mx6q_sabresd-Register-SDHC3-first.patch
patch -p1 < ../meta-tibidabo/recipes-kernel/linux/linux-imx-3.0.35/0001-tibidabo.patch
cp ../meta-tibidabo/recipes-kernel/linux/linux-imx-3.0.35/defconfig .config
Now that you have the sources, you can start browsing the code from the following files:
~/Documents/linux-2.6-imx/arch/arm/mach-mx6/board-tibidabo.c
~/Documents/linux-2.6-imx/drivers/mtd/devices/n25q.c
Source the script to load the proper evironment for the cross-toolchain (see Cross compiler Section) and you are ready to customize the kernel:
cd ~/Documents/linux-2.6-imx
make menuconfig
and to compile it:
make -j <2 * number of processor's cores> uImageIf you omit -j parameter, make will run one task after the other, if you specify it make will parallelize the tasks execution while respecting the dependencies between them. Generally, you will place a value for -j parameter corresponding to the double of your processor’s cores number, for example, on a quad core machine you will place -j 8.
By the end of the build process you will get uImage under arch/arm/boot.
~/Documents/linux-2.6-imx/arch/arm/boot/uImage5.2.1. Build from bitbake
The most frequent way of customization of the Linux Kernel is to change the .config file that contains the Kernel options. Setup the environment and run:
bitbake virtual/kernel -c cleanall
bitbake virtual/kernel -c menuconfig
a new window, like the following one, will pop-up:
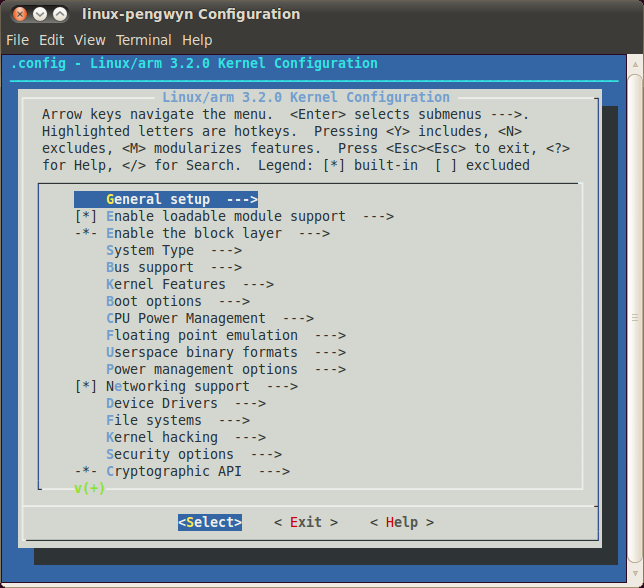
follow the instructions, save and exit, than you ready to generate your preferred image based on your customized kernel. If you prefer, you can build just the kernel running:
bitbake virtual/kernelAt the end of the build process, the output file (uImage.bin), along with the built kernel modules, will be placed under tmp/deploy/images/tibidabo/ inside your build directory, so, if you are building your system from the default directory, the destination directory will be /home/architech/architech_sdk/architech/tibidabo/yocto/build/tmp/deploy/images/tibidabo/.
5.3. Meta Layer
A Yocto/OpenEmbedded meta-layer is a directory that contains recipes, configuration files, patches, etc., all needed by Bitbake to properly “see” and build a BSP, a distribution, a (set of) package(s), whatever. meta-tibidabo is a meta-layer which defines the customizations to make to Freescale’s i.MX6 BSP and Yocto/OpenEmbedded in order to get a working system, tailor made of Tibidabo.
You can get it with git:
git clone -b dora https://github.com/architech-boards/meta-tibidabo.gitThe machine name for Tibidabo is tibidabo.
The strictly BSP related recipes are located under:
meta-tibidabo/recipes-bsp/u-boot/
meta-tibidabo/recipes-bsp/bootscript/
meta-tibidabo/recipes-kernel/linux/
The other recipes are there just to customize other aspects of the system or to offer some facility to help you easily manage some task, for example, working with flash memory or partitions.
Tibidabo is powered by a big serial NOR memory, big enough to place a full featured root file system inside of it. However, you might not be interested in how to place the file system inside of it from the beginning and how to mount and unmount it inside your file system. There is a recipe inside meta-tibidabo, tibidabo-flash-utils, that will install three scripts inside the target file system to make the aforementioned tasks easy:
- tibidabo_fs2flash
- tibidabo_mount_flash
- tibidabo_umount_flash
tibidabo_fs2flash takes as input a .tar.bz2 file, cleans and formats the flash memory, and finally takes the file you gave him to setup the root file system. For more information just run:
tibidabo_fs2flash -hfrom Tibidabo shell.
tibidabo_mount_flash lets you mount the flash memory partition inside your filesystem (under /mnt/flash) without any effort and, likewise, tibidabo_umount_flash helps you unmounting the partition.
Remember that to install those scripts inside the target, you need to add meta-openmbedded/meta-oe meta layer to your bblayers.conf file. If you are working with Architech virtual machine, you don’t have to worry about that, everything is already in place.
tibidabo-flash-utils won’t be placed by default inside your file system, if you want it you need to add a line like this one to your local.conf file
IMAGE_INSTALL_append = " tibidabo-flash-utils"Probably the most comfortable way, at least at the beginning, to build a valid SD card or SATA disk is to use file .sdcard that Bitbake emits when builds an image. However, Bitbake prepares a final iso image to write to the medium without any knowledge of its size. If you write the image on an SD card, for example, the first thing you notice is that the file system does not fit the card. How do you resize partitions and file systems to get the best out of your device? You have two possibilities:
- put your SD card into your computer and use some tool, however, this option is available only on a Linux machines, or
- resize the file system directly on the target board.
meta-tibidabo has a recipe, tibidabo-resize-partition, that puts a script inside the target file system that does online resizing of the last partition on the medium (that must be a primary partition), which can be an SD card, an mSATA hard disk, or an USB memory stick. The script name is tibidabo_resize_partition, to see the help just type:
tibidabo_resize_partition -hon Tibidabo’s console.
An example for resizing the SD card iso image generated by Bitbake, can be:
tibidabo_resize_partition -d /dev/mmcblk0 -p 2then follow the instructions, if any.
Even tibidabo-resize-partition won’t be placed by default inside the final root file system, unless you asks Bitbake for it, by adding the following line to your build directory local.conf file:
IMAGE_INSTALL_append = " tibidabo-resize-partition"5.4. Root FS
By default, Tibidabo’s Yocto/OpenEmbedded SDK will generate three different types of files when you build an image:
- .ext3,
- .tar.bz2, and
- .sdcard.
.ext3 is meant to be used by QEMU and won’t be discussed here. The .tar.bz2 file can be flattened out in your final medium partition (on SD card, flash memory, mSATA disk or USB stick) or on your host development system and used for build purposes with the Yocto Project. File .sdcard can be written out “as is” on the final medium with, for example, dd program:
sudo dd if=/path/to/image.sdcard of=/path/to/your/final/media/deviceWhere, the path to the image .sdcard file inside the SDK virtual machine is:
/home/architech/architech_sdk/architech/tibidabo/yocto/build/tmp/deploy/images/tibidaboWarning
Be very careful when you use dd to write to a device to pick up the right device, otherwise you can mess up another disk you have on your machine, destroying its content forever!
Warning
The content of the media will be lost forever!
Important
Be sure you unmount the device from the filesystem before using dd program, you sure don’t want to have the operating system interfere during the write process.
After dd completes, run:
syncGenerally, especially at the beginning, when you build an image for Tibidabo is more comfortable to create an SD card using the .sdcard file, because you need almost zero effort to get everything running. However, if you need to develop for a while on the board this solution turns out to be inefficient, and you will want a faster solution. Assuming you already built an SD card out of a .sdcard file, you have an SD card with two partitions on it. The first one is supposed to contain the kernel image (uImage file) and the bootscript file, the second partition is supposed to contain the root file system. When you build a new file system you can delete everything contained on the second partition and you can untar file .tar.bz2 to the second partition on the SD card. If you have built a new kernel just overwrite the old one on the first partition. In case you have built a new bootloader take a look at Bootloader deploy.